


Choosing the Best Everest Base Camp Trek Itinerary selection for an Everest base camp trek. You’re interested in trekking the highest peak on earth, but are not sure how you want to do it or who to go with. It not only prescribes how long or how fast your travel time will be, but also the very nature of your experience. There’s no “perfect” itinerary — the perfect itinerary depends on your personal endurance, time, budget, and thirst for adventure. Most people take the classic route from Luk; however, there are a plethora of other treks that have their own rewards. With careful consideration, you can find a plan that will fit your Everest Base Camp Hike needs perfectly.
The 12-day Best Himalaya Treks Classic itinerary:
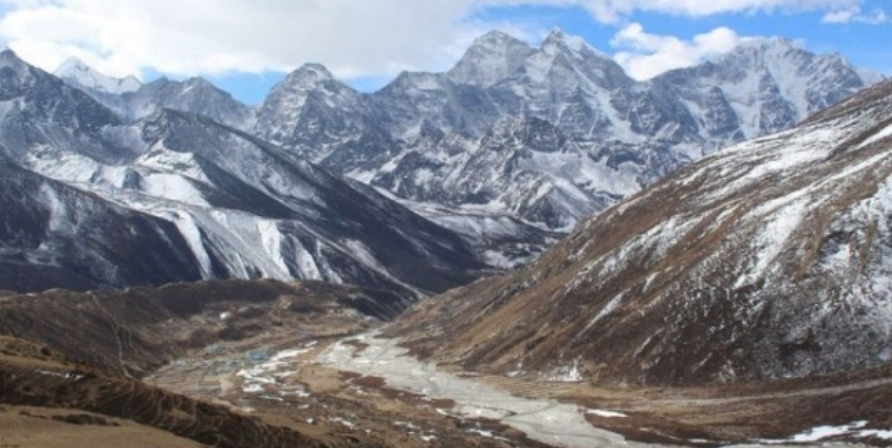
The most popular 12 – 14 itinerary to Everest base camp itinerary preferred by all trekkers. It begins with the exhilarating flight into Lukla and trek along the busy trail to Phakding to the vibrant Sherpa capital town of Namche Bazaar. This schedule follows a principle referred to as proper acclimatisation — a slow, gradual rise. It typically consists of key acclimatization days — one in Namche Bazaar at around 3,440 meters, and a second in Dingboche at 4,410 meters. On these days of rest, trekkers are urged to hike an hour or so as much as higher elevations, then descend to sleep lower, a variation method that science suggests helps the body acclimate to the thinning air. itIt’sar a mild charge of ascent that gives the Everest Base Camp Trek with us one of these excessive fulfillment prices and makes it safe for exceedingly inexperienced trekkers.
The long way: With Detours, and Lakes
For those with more time and a desire to explore deeply into this vicinity of the Khumbu, an extended trek is an extra worthwhile experience. Rather, you may opt to add on a ride to the beautiful Gokyo Lakes and cross the tough Cho la skip to the Everest Base Camp Trek. This longer trek, usually 18 to 20 days, on the road much less traveled takes traffic up to a hidden valley with lovable turquoise lakes and a superb view of Mount Cho Oyu. The extra days additionally provide greater time to acclimate, a capacity boon to trekkers worried about the outcomes of altitude. This preference is extra tough and slightly longer, but it’ll allow you to explore an opportunity aspect of the Everest area from its heavily traveled foremost trail. It’s great for more experienced trekkers who are seeking that additional challenge and rare view of the Himalayas.
The Old Route: Hiking From Jiri
The village of Jiri changed into as soon as the starting point for treks to Everest Base Camp before the Lukla airport was constructed. A route with the taste of ‘the first mountaineers’ day’s odor, and it is still open for those who love adventurous and real old-style climbing! The Jiri-to-EBC trek adds another 7 to 9 days to the entire adventure. It’s a route for good trekkers keen to enjoy the culture and landscapes of the lower Khumbu. But it is a more gradual ascent – kinder for acclimatisation – and goes through mossy forest and tiny villages before rejoining the main route. This addition raises your total EBC Trek Cost, but you have a unique and very rewarding experience, meaning you don’t walk through the crowds and don’t have to get the Lukla flight, which can often be delayed.
A Faster Way: The Helicopter Loop Back to the helicopter pad we go.
No matter whether you are short of time but still wish to experience Everest in person, then the Helicopter return trek is an ideal option. That’s a classic trek to EBC, followed by a helicopter flight from Gorak Shep – or a local helipad – back to Lukla, or (perhaps) all the way down to Kathmandu. This can shave a few days off the trek and is an amazing, everlasting overhead view of the Himalayas! While it takes a lot of time, this way is a motivation other than the more costly which is actually a contributing factor to the Everest base camp tour expense. It is perfect for those short of time (rather than money) who want a unique combination of trekking and luxury.
Trekking Itinerary and Acclimatization
Whichever trail you choose, acclimatization is the major issue to remain safe and have a good trek. A good itinerary, whether for a 12-day classic or a 20-day extended trek, will allow for rest days. These are not days of sitting around; these are days of active acclimatization, where you climb to a higher elevation and then return to sleep lower. That’s because to avoid acute mountain sickness (AMS) — which is a real hazard at high altitudes — the best thing to do is “climb high, sleep low.” We do not recommend you skip these days to save time, as you can cause dangerous side effects, including death. Every single recommended itinerary of the Mount Everest Base Camp Trek will take at least two full acclimatization days (around Namche Bazar and Dingboche) so that your body gets adjusted!
My final thoughts on deciding on your Everest Base Camp itinerary
The best EBC Trek Itinerary is about your personal preference, so you need to be realistic with your body condition, time, and budget. Whether your preference is for the classic, well-trodden path, the more strenuous traverse up to the Gokyo Lakes, the historic ‘Jiri’ route, or being conveniently helicoptered out at the end, it is inevitable that, despite all using the same paths and roads, your trip will be an individual experience. Select a program that makes safety of acclimation its top priority. Armed with your itinerary, you’ll be able to focus on the first-rate enjoyment watching for you. Every step is a planned, nicely planned step in your dream journey to the base of the sector’s highest mountain, and the aid you receive while you have it is going to be your ticket to achievement.